
NodeMCU Web Server Controlled Servo Motor
- Ramesh G

- Jan 10, 2021
- 3 min read
Updated: Jul 2, 2021
Here to show you how to build a web server with the ESP8266 12E that controls the shaft’s position of a servo motor using a Web page slider.

Connecting the Servo Motor to the ESP8266
Servo motors have three wires: power, ground, and signal.
Servo Wire Color
Power-Red
GND-Black, or brown
Signal-Yellow, orange, or white
When using a small servo like the SG90 as shown in the figure below, you can power it directly from the ESP8266.
If you’re using a small servo like the SG90, you need to connect:
GND -> ESP8266 GND pin;
Power -> ESP8266 Vin pin;
Signal -> GPIO 5 (or any PWM pin).

Installing the ESP8266_Arduino_Servo_Library
The ESP32 Arduino Servo Library makes it easier to control a servo motor with your ESP8266, using the Arduino IDE. Follow the next steps to install the library in your Arduino IDE:
Download the ESP32_Arduino_Servo_Library. You should have a .zip folder in your Downloads folder, Unzip the .zip folder and you should get ESP32-Arduino-Servo-Library.
After installing the library, go to your Arduino IDE. Make sure you have the Nodemcu 1.0 ESP-12E board selected, and then, Copy and Paste code in Arduino IDE.
Subscribe and Download code.
#include <ESP8266WiFi.h>
#include <WiFiClient.h>
#include <ESP8266WebServer.h>
//Include the Servo Library
#include <Servo.h>
#include "PageIndex.h"; //--> Include the contents of the User Interface Web page, stored in the same folder as the .ino file
#define ServoPort D1 //--> Defining Servo Port
//Make a wifi name and password as access point
const char* ssid = "TP-Link_3200"; // your SSID
const char* password = "9500112137"; //WIFI Password
//
Servo myservo; //--> create servo object to control a servo
ESP8266WebServer server(80); //--> Server on port 80
//This routine is executed when you open NodeMCU ESP8266 IP Address in browser
void handleRoot() {
String s = MAIN_page; //Read HTML contents
server.send(200, "text/html", s); //Send web page
}
//Procedure for handling servo control
void handleServo(){
String POS = server.arg("servoPOS");
int pos = POS.toInt();
myservo.write(pos); //--> Move the servo motor according to the POS value
delay(15);
Serial.print("Servo Angle:");
Serial.println(pos);
server.send(200, "text/plane","");
}
void setup() {
Serial.begin(115200);
delay(500);
myservo.attach(ServoPort); //--> attaches the servo on D1 to the servo object
WiFi.begin(ssid, password);
Serial.print("Connect your wifi laptop/mobile phone to this NodeMCU Access Point : ");
Serial.println(ssid);
Serial.println("Connecting to WiFi");
while (WiFi.status() != WL_CONNECTED) {
delay(1000);
Serial.println(".");
}
// Print ESP8266 Local IP Address
Serial.println(WiFi.localIP());
//Initialize Webserver
server.on("/",handleRoot); //--> Routine to handle at root location. This is to display web page.
server.on("/setPOS",handleServo); //--> Sets servo position from Web request
server.begin();
Serial.println("HTTP server started");
}
void loop() {
server.handleClient();
}
Creating the HTML Page
we need to include the HTML file PageIndex.h in the sketch and rotate the servo accordingly.
const char MAIN_page[] PROGMEM = R"=====(
<!DOCTYPE html>
<html>
<head>
<meta name="viewport" content="width=device-width, initial-scale=1">
<style>
html {
font-family: Arial;
display: inline-block;
margin: 0px auto;
text-align: center;
}
.slidecontainer {
width: 100%;
}
.slider {
-webkit-appearance: none;
width: 50%;
height: 15px;
border-radius: 5px;
background: orange;
outline: none;
opacity: 0.5;
-webkit-transition: .2s;
transition: opacity .2s;
}
.slider:hover {
opacity: 2;
}
.slider::-webkit-slider-thumb {
-webkit-appearance: none;
appearance: none;
width: 25px;
height: 25px;
border-radius: 50%;
background: brown;
cursor: pointer;
}
.slider::-moz-range-thumb {
width: 25px;
height: 25px;
border-radius: 50%;
background: #4CAF50;
cursor: pointer;
}
</style>
</head>
<body>
<h1>NodeMCU ESP8266 Web Server Controlled Servo Motor</h1>
<br><br>
<div class="slidecontainer">
<input type="range" min="0" max="180" value="50" class="slider" id="myRange">
<p>Servo angle: <span id="demo"></span></p>
</div>
<script>
function sendData(pos) {
var xhttp = new XMLHttpRequest();
xhttp.onreadystatechange = function() {
if (this.readyState == 4 && this.status == 200) {
console.log(this.responseText);
}
};
xhttp.open("GET", "setPOS?servoPOS="+pos, true);
xhttp.send();
}
var slider = document.getElementById("myRange");
var output = document.getElementById("demo");
output.innerHTML = slider.value;
slider.oninput = function() {
output.innerHTML = this.value;
sendData(output.innerHTML);
}
</script>
</body>
</html>
)=====";
Upload the Code
Now, upload the code to your ESP8266. Make sure you have the right board and COM port selected.
After uploading, open the Serial Monitor at a baud rate of 115200. Press the ESP8266 reset button. The ESP8266 IP address should be printed in the serial monitor.

Finally Result.

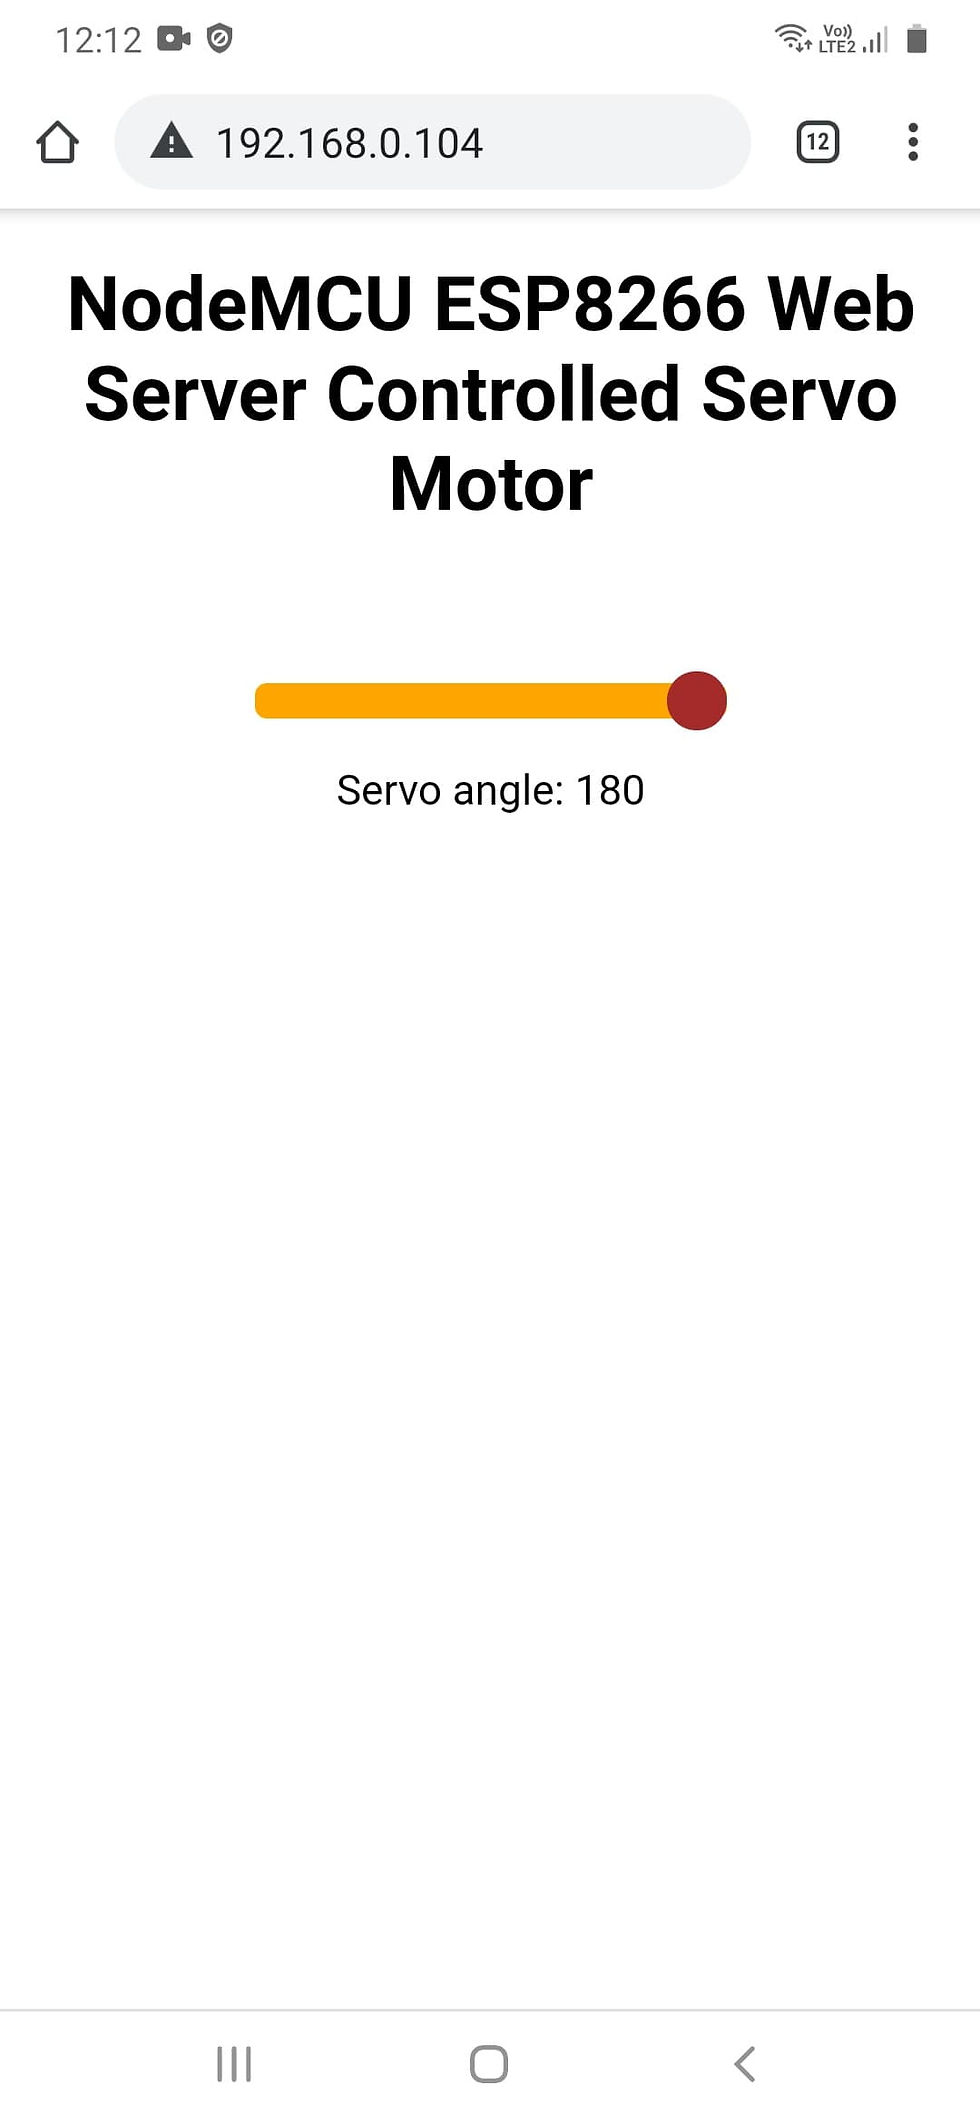


The servo only rotates 90 degrees.