
IoT Based Servo Control (Pan Tilt) Using Blynk app
- Ramesh G

- May 29, 2021
- 2 min read
In this tutorial we will learn how to control a PTZ mini-kit (Pan-Tilt) based Blynk app and SG90 servo motor. For this project, you can use your official Blynk account (and use some energy) or install a local Blynk server and enjoy unlimited energy.

Circuit diagram

Components Required
ESP8266 12e- NodeMCU - 1 no
PTZ SG90 (Pan-Tilt) - 1 no
Servo SG90- 2 no

PTZ SG90 mini kit
Pan and tilt systems used in today's robotics applications for security, industrial, and military applications have to move faster, smoother, and more accurately than ever before. At the same time, these systems need to be cost effective, easy to program.
Refer sssembly :
Connecting the Servo Motor to the ESP8266
Servo motors have three wires: power, ground, and signal.
Servo Wire Color
Power-Red
GND-Black, or brown
Signal-Yellow, orange, or white
When using a small servo like the SG90 as shown in the figure below, you can power it directly from the ESP8266.
If you’re using a small servo like the SG90, you need to connect:
GND -> ESP8266 GND pin;
Power -> ESP8266 Vin pin;
Signal -> D5 and D6 (or any PWM pin).
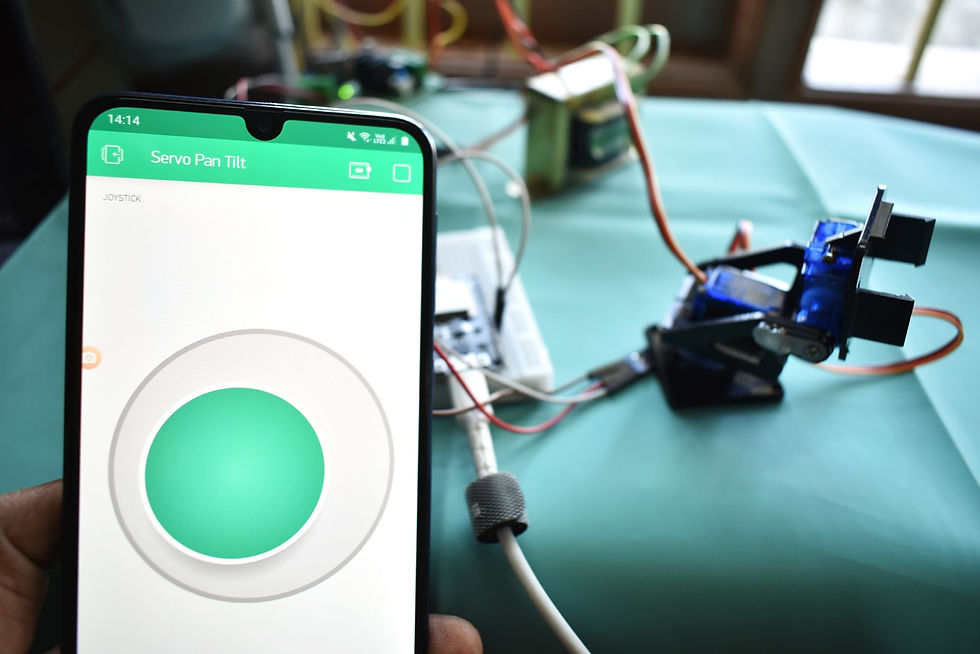
Blynk App
Is an IoT platform to connect your devices to the cloud, design apps to control them, analyze telemetry data, and manage your deployed products at scale


Blynk IoT Setup:
First of all, open the blynk application.
Click on the create a new project
Click on Choice Tools and select NodeMCU ESP8266.
Make sure the connection type is set to WIFI.
Watch video for further setup.


Installing Library
Download these libraries from the given links.
Blynk Download - Blynk Library can connect any hardware over Ethernet, WiFi, or GSM, 2G, 3G, LTE, etc.
After downloading the .zip files, add the libraries in Arduino IDE by clicking on
To install the library navigate to the Sketch > Include Library > Manage Libraries… Wait for Library Manager to download libraries index and update list of installed libraries.
Subscribe and download code.
Arduino code:
#define BLYNK_PRINT Serial
#include <ESP8266WiFi.h>
#include <BlynkSimpleEsp8266.h>
#include <Servo.h>
//SSID and Password of your WiFi router
const char* ssid = "xxxxxxxxx"; // replace with your SSID
const char* password = "xxxxxxx"; // Replace with Wifi Password
//Blynk Token
char auth[] = "xxxxxxxx";
Servo pan;
Servo tilt;
BLYNK_WRITE(V0)
{
Serial.print("move Pan to ");
Serial.println(param.asInt());
pan.write(param.asInt());
}
BLYNK_WRITE(V1)
{
Serial.print("move Tilt to ");
Serial.println(param.asInt());
tilt.write(param.asInt());
}
void setup()
{
Serial.begin(115200); // See the connection status in Serial Monitor
Blynk.begin(auth, ssid, password);
pan.attach(D5);
tilt.attach(D6);
}
void loop()
{
Blynk.run();
}
Then, upload the code to your NodeMCU board. Make sure you have selected the right board and COM port. Also, make sure you’ve inserted your WiFi Credentials in the code.
After a successful upload, open the Serial Monitor at a baud rate of 115200.


Comments